 May 24, 2012
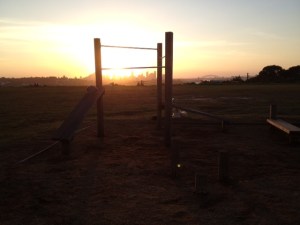
 This is my gym..the great outdoors! It’s free, no gym membership, no waiting for equipment, no room full of sweaty people and no floor length mirrors that show every lump and bump! It’s fresh, it’s real, it’s in touch with nature!
Ok, for all you cynical people I appreciate that the weather isn’t always on our side and in winter the only window of opportunity may be in the pitch black but I guarantee you if you can work around it and take the plunge you will feel wonderful afterwards!
Here is the first in a serious of great outdoor workouts that I will be posting over the coming weeks and months! For these workouts you will need no equipment, other than yourself and a park bench, a high step or a wall that’s around chair height. They are very high intensity workouts meaning that they are quick to do and yet great for calorie burn!
For the first one I am starting with quite simple moves (which will get progressively harder in subsequent workouts) but don’t be fooled, it isn’t as easy as it looks! Especially if you really put your all into it!
Don’t forget to have a bottle of water with you and do some good warm up stretches before you begin. Also make sure that you leave plenty of time at the end to finish with some static stretches. In case you are interested, I will be posting a stretching program in the next few weeks…
| Core Exercises: Complete ONE set of a) followed by 1 set of b) then repeat for the second set | ||
| 1a) Plank – 2 sets 30-60 seconds |  |
Make sure you keep your core muscles engaged for the duration of this exercise – in other words contract your pelvic floor and draw your navel in towards your spine. Push back with the heels and activate your thigh muscles pulling up from the knee caps. Tuck your tail bone under and keep breathing. |
| 1b) Side Plank – 2 sets 30-60 seconds |  |
Make sure you keep your core muscles engaged. Come up onto the elbow making sure there is a right angle at the elbow. Squeeze the bum and pull the hips up. Keep the chest up and open and keep breathing. Make sure you don’t allow all your weight to fall into your shoulder, try to distribute it evenly through the body. |
| 2a) Crunches with raised legs – 2 sets 20 reps |  |
Make sure you keep your core muscles engaged for the duration of this exercise. Make sure the shoulders are completely off the ground for the entire exercise as you flex the trunk up and down slowly. |
| 2b) Bicycle crunches – 2 sets 20 reps – SLOW! Hold each rep for 3 seconds |  |
Make sure you keep your core muscles engaged for the duration of this exercise. Make sure the shoulders are completely off the ground, bringing the elbow as close to the knee as you can. |
| CIRCUIT : 45 – 60 secs for each exercise (depending on fitness level) | ||
| Complete each of the exercises below in turn and then move on to the next one with very little rest. When you get to the end, have a short rest and then repeat the circuit 2 more times. | ||
| Side Step Ups – Do one leg for 45-60 seconds and then swap sides |   |
FAST FAST FAST!!!! Keep your core muscles engaged (navel in towards the spine). Make sure that the heel that’s on the bench remains in contact with the bench at all times and push up through the heel and the bum. Do not let the foot on the bench leave the bench! Breathe out as you step up. Don’t let yourself bend forwards when you get tired. |
| Kick Ups – FAST! |   |
Alternate legs making sure you kick nice and high! Keep your core muscles engaged at all times. Breathe out as you kick up. |
| 1-Leg Press Ups |   |
Keep core muscles engaged at all times. Breathe in as you go down and out as push up contracting the chest muscles. Start with 1 leg if you can and then drop to 2 legs when it becomes too difficult. Or you can start with 2 legs or even on your knees depending on your level. |
| Lunge to Balance |   |
Keep core muscles engaged. Breathe in on the way down and out on the way up. Make sure you keep your back straight and don’t let your knee go over the end of your toe when you are in the down position. Push off from the heel as you stand up. |
| Triceps Dips |   |
Feel free to have your knees bent if too difficult with straight legs…Keep your back straight at all times and chest out. Make sure your core muscles are engaged. Breathe in as you go down and out as you come up. |
| Mountain Climbers – Fast! |  |
Keep your core muscles engaged and make sure you keep breathing! Make sure your shoulders remain above your wrists. Keep switching legs as fast as you can for the allotted time. GREAT WORKOUT!!! WELL DONE!!! |